10-mn tuto: Install a local LLM on Windows with Ollama
In the previous post, I suggested some approaches to help as many people as possible understand the latest innovations in AI. Now, it only makes sense to set a good example from a tech popularization perspective 🙂
As the post title suggests, here’s a quick, simple, and effective tutorial to install your own large language model instance, or LLM, locally on a Windows PC using Ollama.
Foreword: This article, enhanced with improvements generated by AI (Napkin , Google AI, Perplexity), is made available under the CC BY-ND 4.0![]()
![]()
![]()
What is an LLM?
Great question, thanks for asking 😀 An LLM (Large Language Model) is an artificial intelligence model trained on massive amounts of text data to understand and generate human language, learning to predict the next words in a sequence.
Among the best-known models for the general public:
- Available through ChatGPT, OpenAI’s GPT models (GPT-4o, o3 and o4-mini).
- Grok, by xAI, fully integrated into X.
- Google Gemini, featured in Google tools like Gmail, Google Drive, Google Docs, etc.
- LLama models from Meta, fully integrated into Facebook, Instagram, and WhatsApp, and open-sourced since LLama 2 in July 2023 (GitHub repo).
From this core capability, the applications of these AI models are numerous:

- Advanced chatbots
- Automated customer support,
- Interactive FAQ.
- Large-scale data processing
- Summarization,
- Extraction, refinement, and classification.
- Automatic translation
- For my previous article, I was glad to have access to LLMs to translate Chinese academic papers!
- Code generation
- Widely used for coding assistance, I use GitHub Copilot to harmonize this blog’s Markdown code!
- Reasoning simulation
- The latest achievements in this area are really interesting. Besides the DeepSeek-R1 model, I experiment a lot with Gemini Pro 2.5’s Deep Search.
10 minutes flat to install an LLM on a Windows PC—is it possible?
Really?
OK, you won’t be running inferences with hundreds of billions of parameters on your laptop, let alone commercial models, but you can easily run smaller, yet powerful enough LLMs for fun!
What’s the point of a local LLM?
Personally, I see only benefits:

- Access to a wide range of recent open-source LLMs, including reasoning models like DeepSeek-R1 or Qwen 3.
- Guaranteed privacy: once the model is on your PC, no data leaves your computer, protecting all exchanges with the model (texts, images).
- No subscription for available features.
- Give a second life to older PCs. For example, I repurposed an old laptop with a Core i5 and 16 GB RAM as a personal server with Ubuntu, and I run a small model on it!
What are the components?
Ollama
Available on Linux, MacOS, Windows, and Docker, this open-source software platform allows you to manage and run language models locally.
- Website: https://ollama.com
- Discord: https://discord.com/invite/ollama
- List of available models: https://ollama.com/library
- You can sign up here to publish and share your own models.
- GitHub repo: https://github.com/ollama/ollama
Hollama - Webchat Client for Ollama
Also available on Linux, MacOS, Windows, and Docker, this app is a webchat client compatible with Ollama and OpenAI.
- GitHub repo: https://github.com/fmaclen/hollama
- Live demo: https://hollama.fernando.is/
I chose Hollama for its ease of use, especially for loading new models directly through the graphical interface.
System Requirements
No need for a dedicated graphics card or a Copilot+ PC; the following config is enough to get started!
| Component | Minimum configuration |
|---|---|
| Operating System | Microsoft Windows 10 or Windows 11, Home or Pro edition, up to date with the latest patches |
| CPU | 4 cores, Intel/AMD, x86-64 |
| RAM | 8GB |
| Storage | 10GB available |
| Internet connectivity | Required for installing components and downloading language models. |
I validated this tutorial on virtual machines using this minimum configuration, so you can proceed with confidence 😉
Language model used in the tutorial - gemma3:1b-it-qat
gemma3:1b-it-qat refers to a lightweight and efficient version of Google’s open-source Gemma 3 model:
- 1 billion parameters (“1b”).
- Instruction-tuned ("it"): Optimized to follow instructions and respond conversationally, this model is ideal for text generation, summarization, and translation.
- Quantization-Aware Trained ("qat"): Trained to support quantization (e.g., 4-bit), which greatly reduces memory requirements while maintaining quality close to larger models.
How do you do it? (Step-by-step guide)
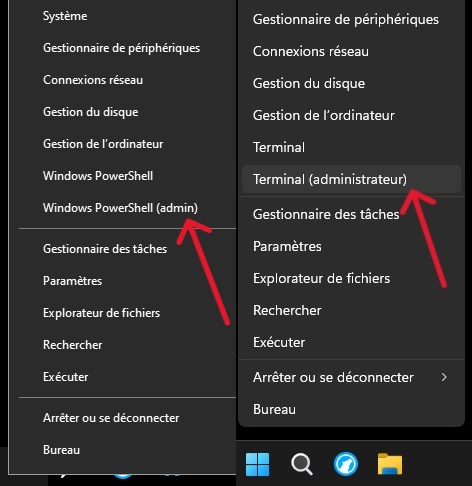
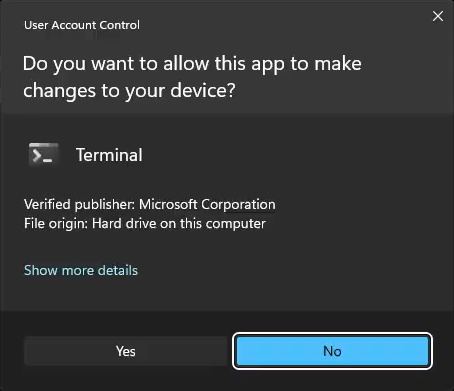
Open PowerShell as administrator
-
Right-click the Start menu and select “Terminal (Admin)” or “Windows PowerShell (Admin)”.
-
Click [Yes] to accept privilege elevation.
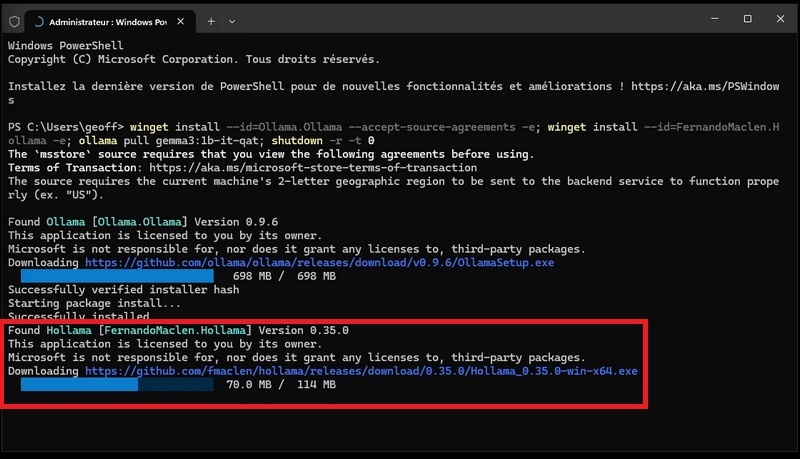
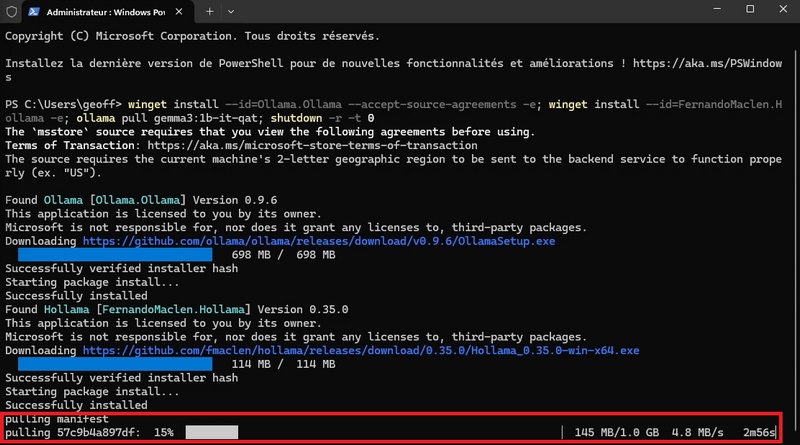
Install a local Ollama instance, install the GUI, and fetch the gemma3:1b-it-qat model in a single command
- Run this command:
winget install --id=Ollama.Ollama --accept-source-agreements -e; winget install --id=FernandoMaclen.Hollama -e; ollama pull gemma3:1b-it-qat; shutdown -r -t 0- Once the package is downloaded and verified, the Ollama instance installation process begins, and the Ollama installer GUI appears.
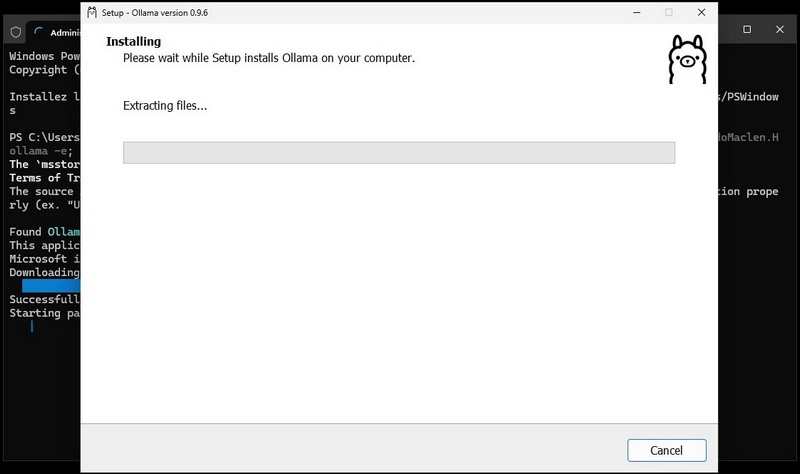
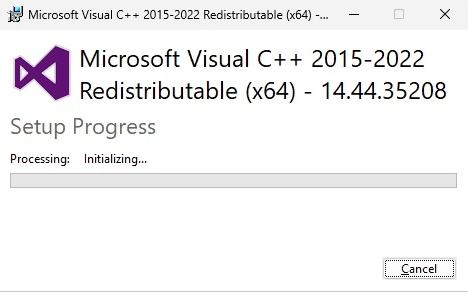
- During the final steps of this first installation process, the Microsoft C++ 2015/2022 Redistributable may be installed automatically if not already present.
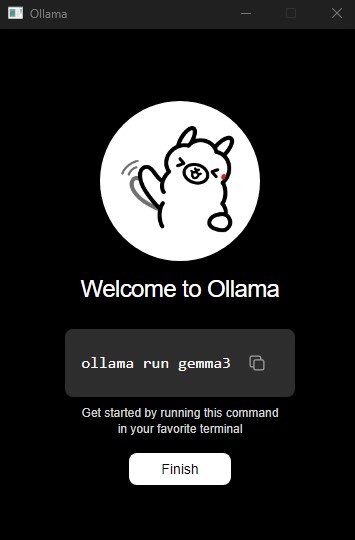
- At the end of the Ollama instance installation, a welcome window appears. Click [Finish] to close it.
- With the local Ollama instance installed, the Hollama GUI installation proceeds automatically.
- Once this installation process is complete, the gemma3:1b-it-qat model download to the local Ollama instance starts automatically.
- Once the model is downloaded, the system will automatically restart. After rebooting, you’ll see the Hollama app icon on the Desktop.
![]()
Finalize installation
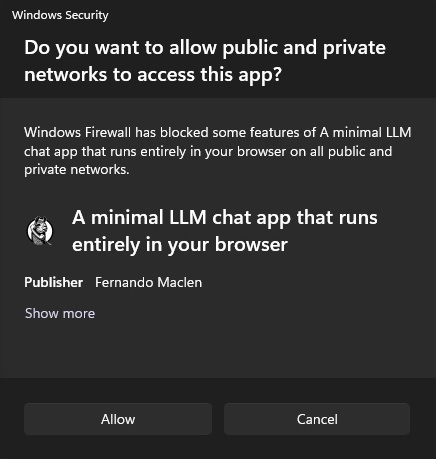
- Double-click the Hollama icon on the desktop to launch the GUI. A Windows Firewall notification appears; click [Cancel] to block incoming connections.
- Once the app starts, it opens directly in the settings interface.
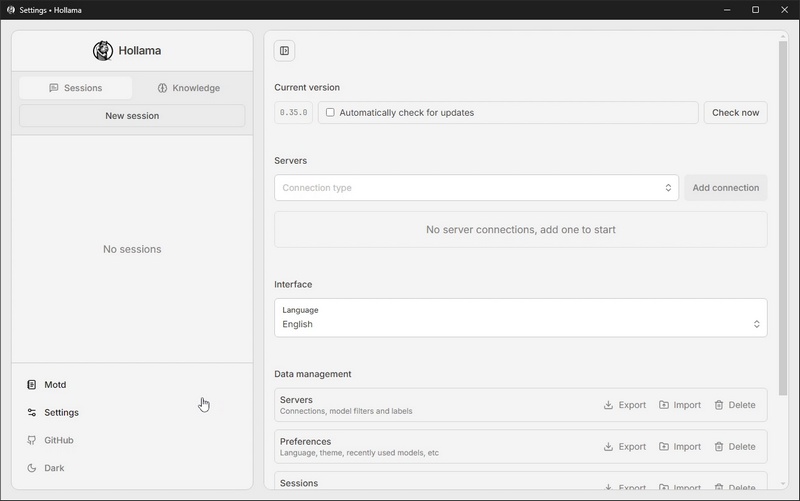
- In the Servers section, select “Ollama” in the “Connection type” dropdown, then click [Add connection].
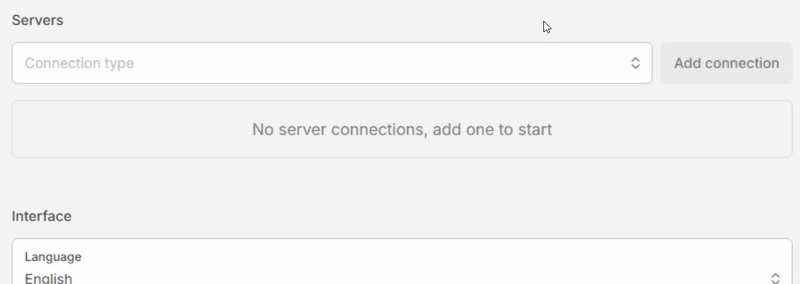
- Click [Verify]. If all goes well, the message “Connection has been verified and is ready to use.” appears in a green box at the top, and the “Use models from this server” box is checked automatically.

Test your first prompt
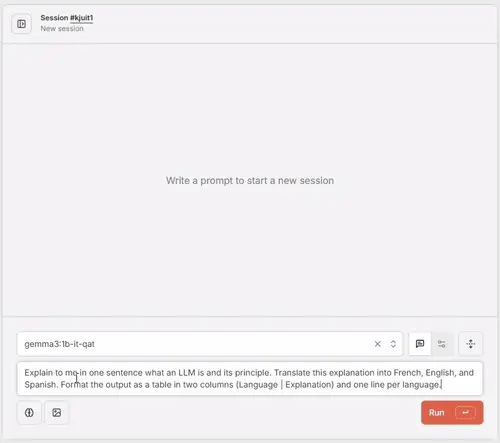
- In the left menu, click [New session].

- Make sure the model is present in the dropdown, write your prompt, click [Run]. Wait a few seconds, and voilà—magic 😀
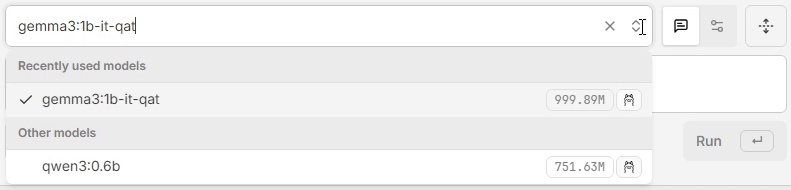
How to download other models with the GUI?
- Go back to the Hollama app settings.
- Under the “Ollama” connection settings, click the “Ollama’s Library” link. In the new window, browse the available model catalog, copy the identifier of the model you want to load (e.g., qwen3:0.6b), then close this window.

- Back in the “Ollama” connection settings, paste the model identifier into the “Pull model” textbox, then click the red button to start loading.

- An info message appears at the top to show progress. The new model will be loaded and ready to use when the message turns green.

- You can now select and use this new model in conversation sessions.
(If needed) Completely remove installed components
- Open PowerShell as administrator (see first step),
- Run the following command to remove all installed components (apps and models):
winget uninstall --id=Ollama.Ollama ; winget uninstall --id=FernandoMaclen.Hollama; winget source reset --force; rm $env:USERPROFILE\*ollama* -R; rm $env:USERPROFILE\AppData\Local\*ollama* -R; rm $env:USERPROFILE\AppData\Local\Temp -R; rm $env:USERPROFILE\AppData\Roaming\*ollama* -R; shutdown -r -t 0- Once the components are uninstalled, the system will automatically
Conclusion
In just a few minutes, you can now experiment with the power of local LLMs on your Windows PC, without any subscription or cloud dependency. Whether for learning, coding assistance, or simply exploring the latest advances in artificial intelligence, Ollama and Hollama offer a simple and accessible solution.
Don’t hesitate to try out different models and share your feedback or discoveries!