Thunkable Tuto (1/2): Create a Cloud-connected mobile app with Firebase, no-code
Starting this year, I have the opportunity to act as a mentor for the Technovation Montreal program. Seeing teams go from a simple idea to a functional mobile prototype in just a few weeks reminded me of one key thing: no-code is an absolutely fantastic driver of innovation.
Even when you aim to develop mobile apps from scratch using advanced frameworks like React Native, leveraging these visual platforms allows you to validate a backend architecture and an interface logic in a flash 🙂
To put my money where my mouth is, I’m proposing a new two-part tutorial series to build a dynamic, Cloud-connected iOS/Android mobile app, without writing a single line of traditional code.
Foreword: This article, enhanced with improvements generated by AI (Google Gemini), is made available under the CC BY-ND 4.0![]()
![]()
![]()
What’s the game plan?
The goal of this mini-series is to build a mobile app by progressively integrating professional concepts. Here is our roadmap:
- Today: Create the interface for a “Motivational Quotes” app (MotivApp) using Thunkable, and connect it to a real, real-time Cloud database with Firebase.
- Part 2: Make the app smart by replacing our database with calls to the Google Gemini API to generate unique quotes on the fly 🚀
15 minutes flat to prototype our app!
Our application will feature two screens: a home screen with an “Inspire me!” button, and a display screen that will randomly pull a quote stored in the Cloud.
Step 1: Prepare the backend with Firebase
Firebase is Google’s platform that provides ready-to-use backend services. We are going to use its Realtime Database.
- Log into the Firebase Console with a Google account and click on Create a project (name it MotivApp).
- In the left menu, go to Databases & Storage > Realtime Database and click on Create database. Choose the test mode to start easily.
- In the Data tab, we will structure our database with unique identifiers to make it robust. Click on the three little dots to the right of your database URL, choose Import JSON, and import a file containing this:
{
  "quotes": {
    "quote_001": {
      "text": "Success is falling nine times and getting up ten.",
      "author": "Japanese Proverb"
    },
    "quote_002": {
      "text": "Make your life a dream, and a dream a reality.",
      "author": "Antoine de Saint-Exupéry"
    },
    "quote_003": {
      "text": "Innovation distinguishes between a leader and a follower.",
      "author": "Steve Jobs"
    }
  }
}
Keep your database URL and your Web API key (available in the Firebase project settings) handy, we’ll need them in Thunkable!
The easiest way to find your API key is to:
- Go to the Project overview page in the Firebase console.
- Click on the button [+ Add app]
- Click on the button </> to add a Web app.
- Put MotivApp as app nickname, then click on [Register app].
- You’ll get a pop up with the values you need.

Step 2: The Design (Visual Interface)
Create a free account on Thunkable and start a new project :
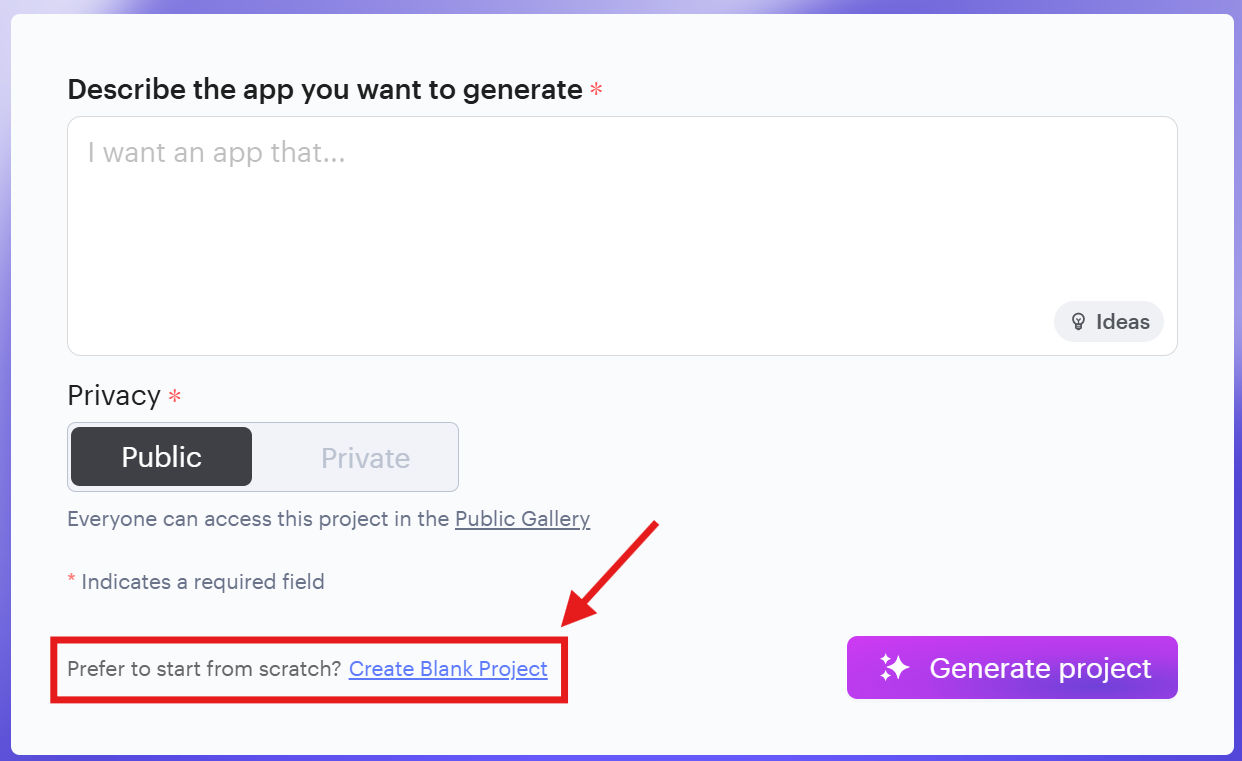
- On the main screen, you’ll have a prompt box.
- At the bottom of that prompt box, find the line “Prefer to start from scratch?” then click on Create Blank Project”.
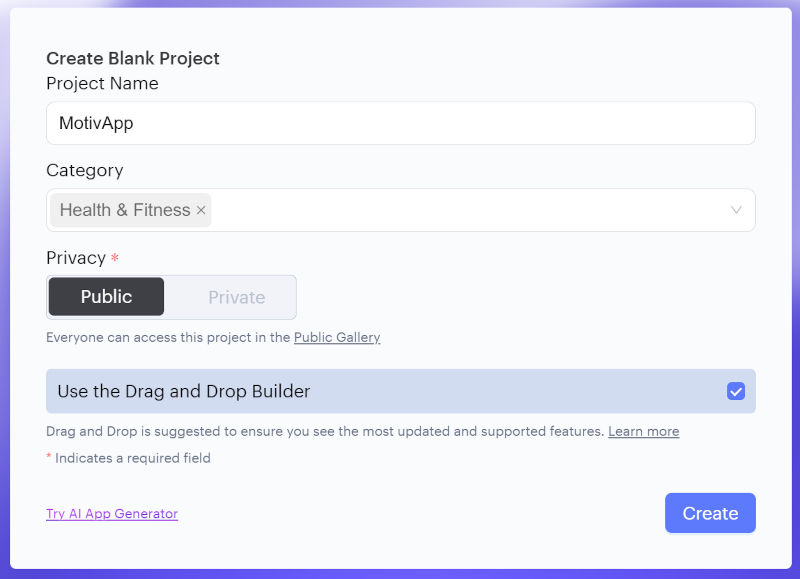
- Put MotivApp as Project name, select Health & Fitness, make sure that Use the Drag and Drop Builder is selected.
- Click on [Create].
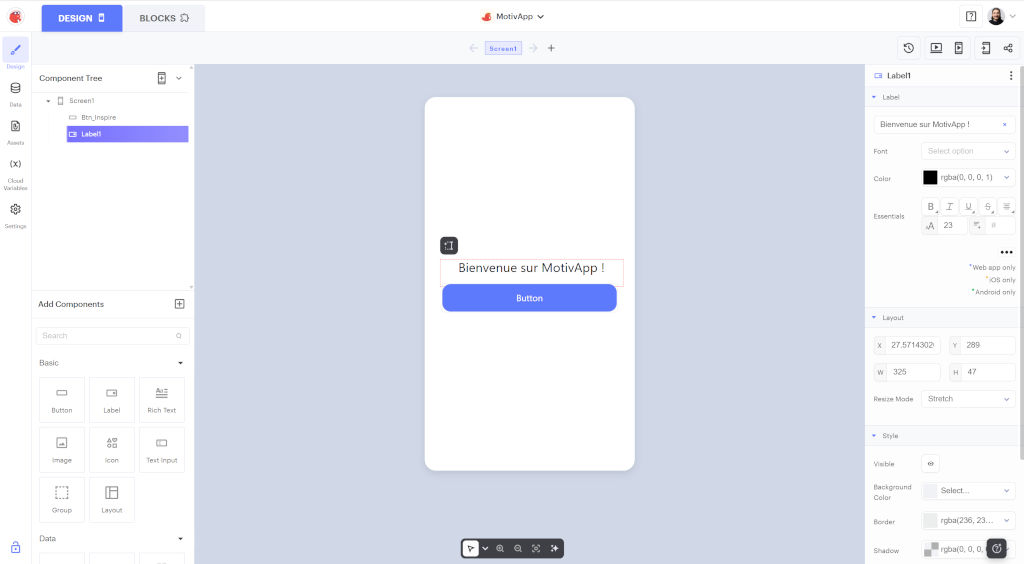
On Screen1 (Home):
- Drag a Label component to the center of the screen with the text “Welcome to MotivApp!”. Center text and change font zsize using the options in the left tree view.
- Drag a Button component below it. Change its text to “Inspire me!”. Rename this component to
Btn_Inspirein the left tree view.
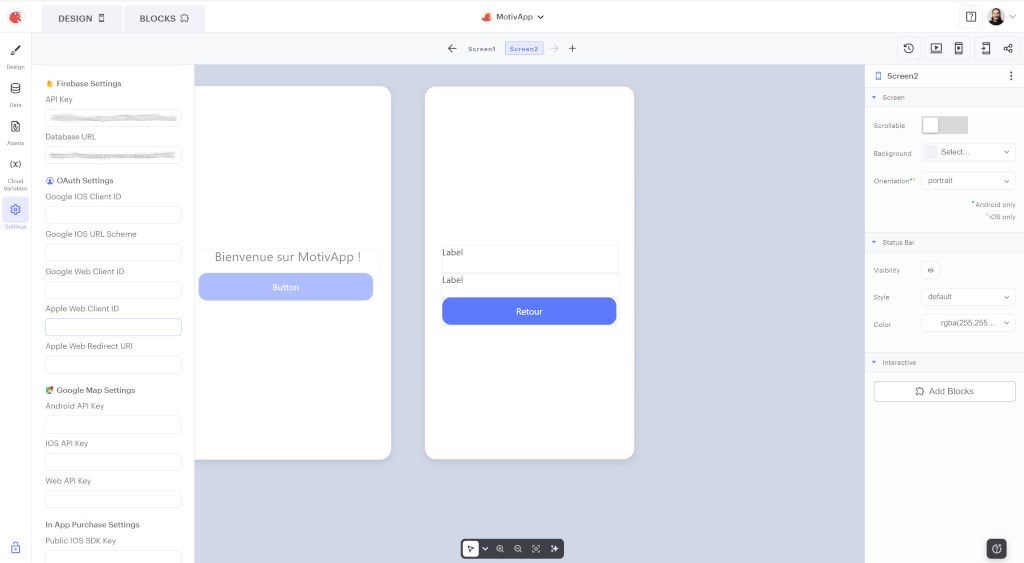
On Screen2 (Quote):
- Add a second screen (
Screen2). - Drag two Labels one below the other. The first one (main text) will be renamed
Label_Quote, the second one (smaller, for the author) will beLabel_Author. - Drag a Button below with the text “Go Back” (
Btn_GoBack). - Connect your Realtime Database
- In your Thunkable tab, click the Settings gear icon in the sidebar.
- Scroll to the Firebase section and paste the “apiKey” into the “Firebase API Key” field.
- Still in the Firebase section, paste the “databaseURL” into the “Database URL” field.
Step 3: The Logic (Blocks)
Switch from the Design tab to the Blocks tab. This is where the magic happens!
Screen1 Logic:
- Grab the
when Btn_Inspire Clicks doblock and drag theNavigate to Screen2block inside it.
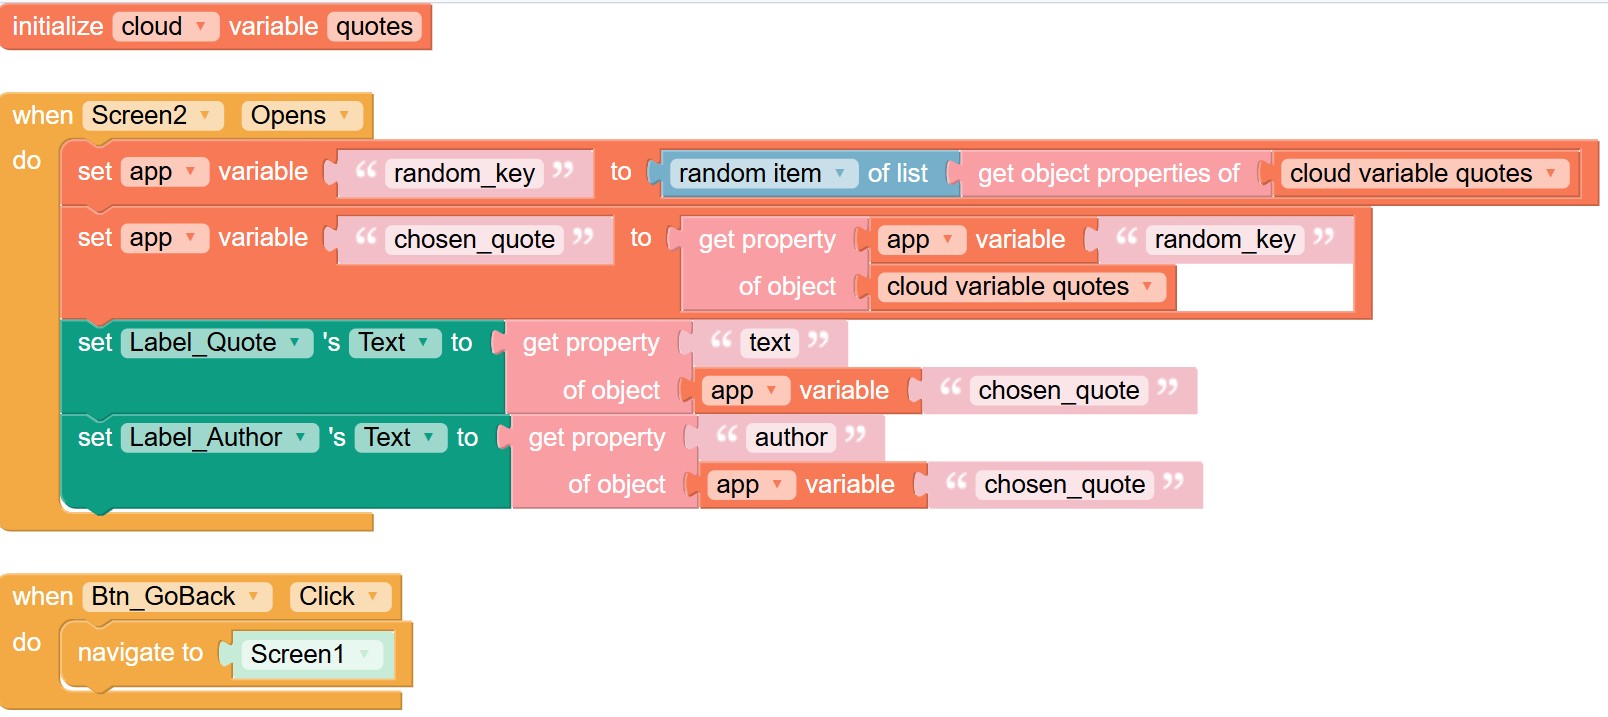
Screen2 Logic (Extracting JSON data): Here, we need to retrieve our dictionary of quotes, pick one at random, and then isolate its text and author.
- Go to Variables and grab the
initialize cloud variable nameblock. Name it"quotes"(this must exactly match the root node name of our JSON in Firebase so Thunkable syncs it automatically). - Grab the
when Screen2 Opens doblock. - Inside, we’ll first list our keys. Create a temporary variable
random_key. Assign to it therandom item of listblock. The list to provide will be generated by theget object properties ofblock (in the Objects category) applied to ourquotescloud variable. - Now that we have a random key (e.g., quote_002), let’s create a
chosen_quotevariable. Assign to it the property (get property of objectblock) corresponding torandom_keyextracted from ourcloud quotesobject. - Finally, update your labels! Assign the
"text"property of thechosen_quoteobject toLabel_Quote, and its"author"property toLabel_Author. - Grab the
when Btn_Inspire Clicks doblock and drag theNavigate to Screen1block inside it.
Step 4: Test the beast!
No need to compile!
- Download the Thunkable Live app on your smartphone (iOS or Android).
- Log in with your account. Tap your project and test: you should see a new quote pulled directly from your Cloud database with every try 😉
Conclusion
And there you have it! You’ve created a real mobile app connected to a professional backend. The huge advantage of this architecture is that you can now add, edit, or delete quotes directly from the Firebase console, and your users’ app will update instantly, without them having to re-download it.
But why stop there? In part 2 of this tutorial, we will replace our Firebase database with the Gemini artificial intelligence API. Our app will no longer just read quotes, it will invent them on demand! Stay tuned.